MAINTENANCE
 (Special thanks to Georgia Krusell, a former middle school PE teacher in Hudson,
Wisconsin, for preparing the following. Georgia taught thousands of students to in-line skate during her nearly 20 years of teaching Skate in School.) (Special thanks to Georgia Krusell, a former middle school PE teacher in Hudson,
Wisconsin, for preparing the following. Georgia taught thousands of students to in-line skate during her nearly 20 years of teaching Skate in School.)
Daily
Use & Storage
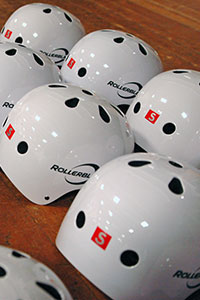
Helmets
• At our school, students are required to wear a helmet and a "bouffant" cap under their helmet. The "bouffant" caps help keep the helmets more sanitary.
• Students are issued one bouffant cap. You can purchase them (100 for about $6) on-line from Uline here.
• The students write their name and hour of PE on the bouffant cap.
They keep it in their lockers for the entire unit.
• Students needing a new bouffant can purchase one from us
for 10 cents.
Other options for helping keep helmets more sanitary include:
• Allowing your students to bring a baseball cap from home and allowing them to wear the cap backwards under their helmet.
• Large, commercial-grade, disposable paper coffee filters that students can wear under their helmet. You can purchase these in bulk at a warehouse club or on-line from Amazon (1,000 for $15) here.
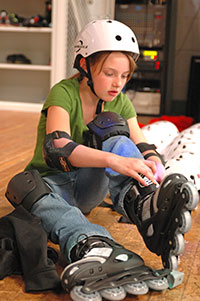
Protective Gear
• All of the separate types
of gear and sizes are stored in their
own individual laundry baskets. As of 2015, all new protective gear in the Skate in School program comes with color-coded stitching for the different sizes. We then color code the laundry baskets to match. Airing
out the equipment is important because equipment
gets damp from use and the laundry baskets are ideal
for allowing them to dry.
• At the end of the day we spray Lysol into the container,
mix it up, and repeat. We then let them dry out inside the laundry
baskets. (Note: During the pandemic, we recommend using Lysol on all gear between each class.)
• Some students are squeamish about wearing sweaty gear.
We let them wear their long pants and long sleeves if they wish.
I have also told some they could wear a light pair of gloves
under the wrist guards.
• Absolute control on how the students return gear is essential.
If not, you will become very frustrated at what you have to do
to fix things for the next class.
1.
Five minutes before class ends, all students sit down and begin
taking off gear in a specific order.
2. Wrist guards, helmet, elbow, knee, skates. If I don't do it
in this order, there is disorder. It is difficult to remove other
equipment with wrist guards on so they come off first.
3. It is essential that they Velcro the tabs back onto the Velcro
teeth or it all gets stuck together in the container.
4. Students then have to stack their safety gear in their helmet
as follows: knees, elbow, and wrist guards. They should be stacked
in a neat pile. The next step is to leave their skates on the
floor and present their pile of gear to me. I observe it and
look for all items to have Velcro secured. I then tap it as their "ok" to
begin returning it to the correct size and color coded laundry
basket.
5. The student re-clips the helmet, returns it to the cart, then
goes back to get his/her skates.
6. Finally, the student returns the skates to the correct location
on the cart where they had placed their shoes. The skates are
paired either in a row or side by side.
Marking Skates
All new Spiritblade RTL skates in the Skate in School program have the sizes already on the back of the skate. For the youth, adjustable skates, you can use a permanent marker.
Cleaning Procedures
This is done two times a year. Equipment is cleaned at the end
of 12 weeks of use and once during the 12 weeks. Lysol use on
safety gear and skates is daily.
Helmet Cleaning
1. Remove all of the foam Velcro removable tabs inside of the
helmet. Put them in a secure laundry bag and place it in the
washer. Set dryer on air dry.
2. I do this next step in the custodial area because it has a
big floor grate drain area. I have also done it in the shower
rooms). Fill two large plastic containers with water. One has
laundry detergent in it; the other has plain water. I place the
helmets in the soapy bucket. I take a towel and wash each helmet. When I
am finished cleaning all of the helmets, I use the custodian's
water hose to rinse them all down again (this can also be done
in the shower room). Then I put the helmets in our storage area
to dry.
3. When it is time to replace the foam Velcro tabs, I have the
students do this on one of the first days of equipment use.
Safety Gear Cleaning
Note: This is my method, not a manufacturer recommended method.
Although this method produces additional wear on equipment
and may cause damage, we do it to save the time that hand washing
would take.
1.It is very important to have all of the Velcro gear secured
into all of the exposed Velcro teeth. All gear should be secured
as if they were being worn.
2.The gear is then sorted into like sizes and type: elbow, knee
and wrist guard. I do each load separately to save time for later
reorganization.
3. Using a front end loading machine on cold and gentle cycle,
I let the machine do the work. You can also fast forward the
machine so as not to agitate too much.
4. When removing the gear, you may let them air dry or use a
dryer that has air and cool cycle. I have been drying mine in
a dryer. You must make sure that all the straps are secure again
before you dry them in the dryer. If you do not make sure the
straps are secure, you will have a tangled mess.
5. An alternative to dryer use is line drying the gear outside
or inside.
Whenever I can, I use student assistants and check their work
completely.
|